Table of Contents
A little while ago I decided to play with vGPU in my homelab. This was something I had dabbled with in the past but never really had the time or need to get working properly.
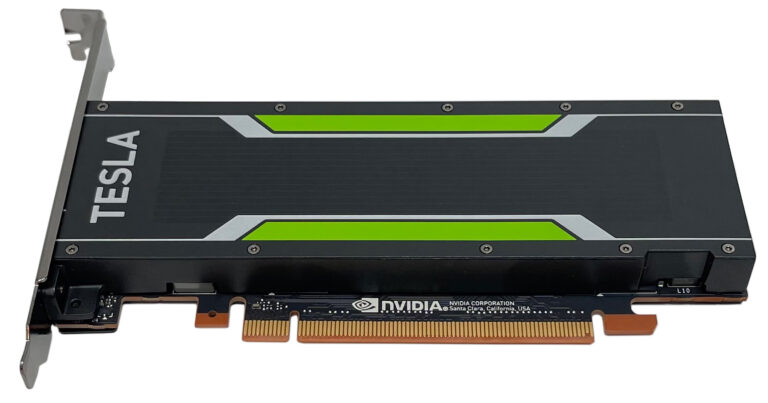
The first thing that I needed was a GPU. I did have a Dell T20 with an iGPU built into the CPU but I wanted a more enterprise card for my testing. I therefore decided to pick up a Nvidia Tesla P4 from eBay for the princely sum of £185.
The card stats are not impressive by modern standards but it was good enough for what I needed combined with the fact that it was a single-width PCIe 3.0 x16 card and didn’t require external power. An important note is that this is a passively cooled card so if it’s not located in a server with a reasonable airflow then you may run into some thermal issues. 3D printer fan shrouds are available on eBay to work around this issue.
Card Stats
GPU 1 NVIDIA Pascal™ GPU
NVIDIA® CUDA® Cores 2,560
Memory Size 8 GB GDDR5
H.264 1080p30 Streams 24
vGPU Profiles 1 GB, 2 GB, 4 GB, 8 GB
Form Factor PCle 3.0 single slot
(low profile) for rack servers
Power 75 W
Thermal Solution Passive
In a VMware environment, the first decision is to how are you going to use the card. There are two basic modes of operation either GPU pass through where the entire card is passed into a single VM or vGPU where the card can be carved up into multiple gFX cards and be presented to one or more VM’s at the same time. It was this latter option that I planned to implement. I wanted at least one node presented through to a Horizon VDI instance. The other node was going to be used as a Tdarr Node
Install steps
I installed the card into one of my 4 Supermicro nodes. With the graphics card installed I was limited to the onboard 2xGb Nic’s but that would be sufficient for initial testing. Initial attempts at getting this to work with vSphere 8 seemed to have issues so I rolled this node back to vSphere 7.0u2 as I knew this combo would work.
The first step is to install the drivers into the ESXi Host. This is straightforward and as I was only doing this to a single host I copied the relevant driver to a datastore and then ran the below command to perform the install
esxcli software vib install -v /vmfs/volumes/623a916d-ccad8ff0-0000-000000000000/Nvidia/NVD_bootbank_NVD-VMware_ESXi_7.0.2_Driver_535.54.06-1OEM.702.0.0.17630552.vibAt the end of the installation a host reboot is required (even if it says it isn’t )
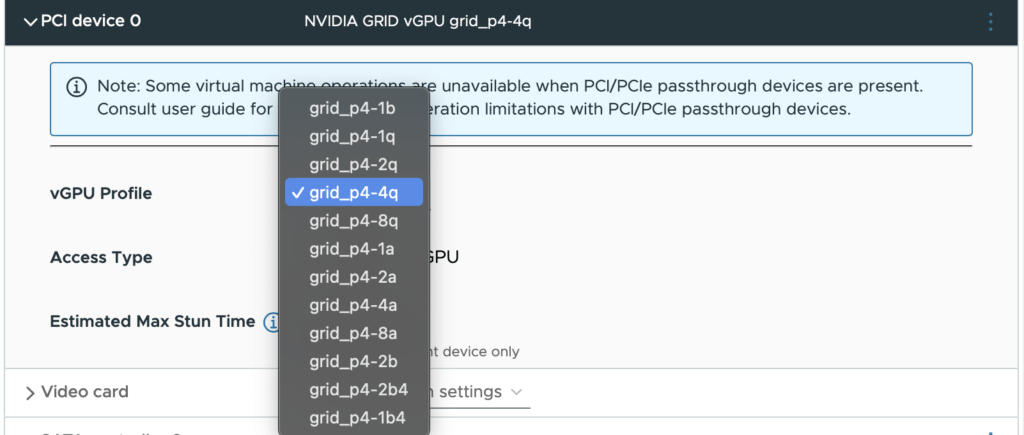
Once this has been done you should have the ability to add PCI devices with the associated Nvidia Profile as you can see all of the below ones are grid_p4 as this is the card that I am using.
The Nvidia GPU Software Docs list the capabilities of each profile I have copied the relevant table below.
| Virtual GPU Type | Intended Use Case | Frame Buffer (MB) | Virtual Display Heads | Maximum Resolution per Display Head | Maximum vGPUs per GPU | Maximum vGPUs per Board | Required License Edition |
|---|---|---|---|---|---|---|---|
| P4-8Q | Virtual Workstations | 8192 | 4 | 4096×2160 | 1 | 1 | Quadro vDWS |
| P4-4Q | Virtual Workstations | 4096 | 4 | 4096×2160 | 2 | 2 | Quadro vDWS |
| P4-2Q | Virtual Workstations | 2048 | 4 | 4096×2160 | 4 | 4 | Quadro vDWS |
| P4-1Q | Virtual Desktops, Virtual Workstations | 1024 | 2 | 4096×2160 | 8 | 8 | Quadro vDWS |
| P4-8C | Training Workloads | 8192 | 1 | 4096×21602 | 1 | 1 | vCS or Quadro vDWS |
| P4-4C | Inference Workloads | 4096 | 1 | 4096×21602 | 2 | 2 | vCS or Quadro vDWS |
| P4-2B | Virtual Desktops | 2048 | 2 | 4096×2160 | 4 | 4 | GRID Virtual PC or Quadro vDWS |
| P4-2B4 | Virtual Desktops | 2048 | 4 | 2560×1600 | 4 | 4 | GRID Virtual PC or Quadro vDWS |
| P4-1B | Virtual Desktops | 1024 | 4 | 2560×1600 | 8 | 8 | GRID Virtual PC or Quadro vDWS |
| P4-1B4 | Virtual Desktops | 1024 | 1 | 4096×2160 | 8 | 8 | GRID Virtual PC or Quadro vDWS |
| P4-8A | Virtual Applications | 8192 | 41 | 1280×10244 | 1 | 1 | GRID Virtual Application |
| P4-4A | Virtual Applications | 4096 | 14 | 1280×10244 | 2 | 2 | GRID Virtual Application |
| P4-2A | Virtual Applications | 2048 | 14 | 1280×10244 | 4 | 4 | GRID Virtual Application |
| P4-1A | Virtual Applications | 1024 | 14 | 1280×10244 | 8 | 8 | GRID Virtual Application |
VM Provisioning
With that configured the next step was to provision a VM and use the associated drivers within the VM.
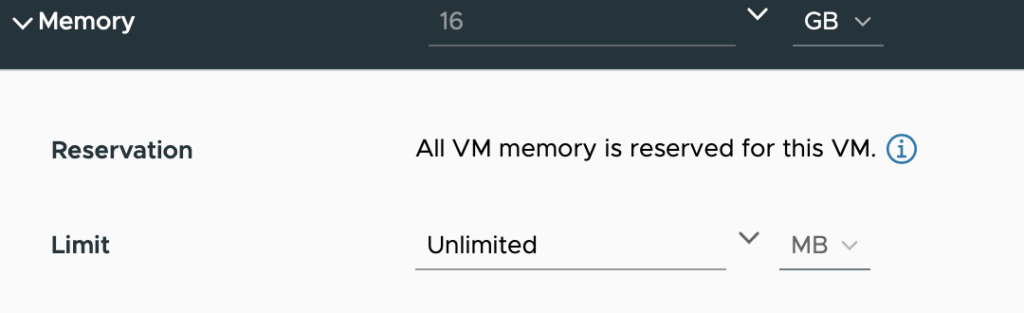
Please note that when utilising PCI passthrough all of the memory must be reserved for the VM
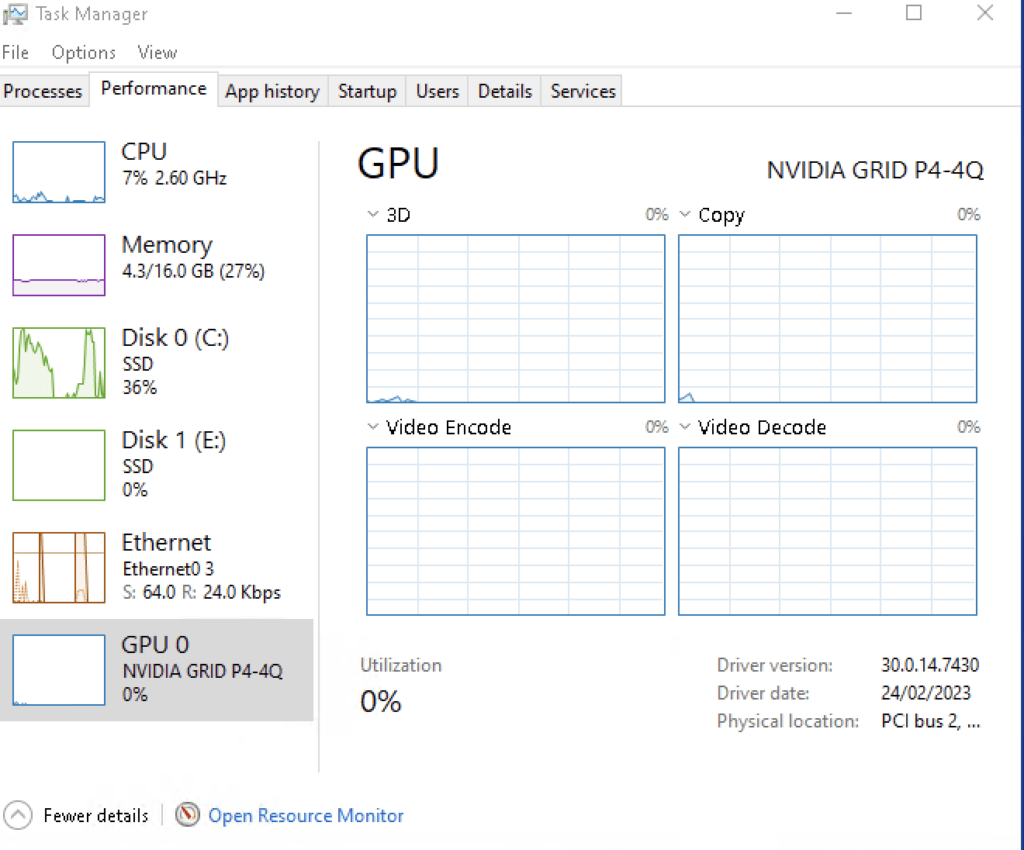
With the VM running and the drivers installed we can now see the graphics card in windows
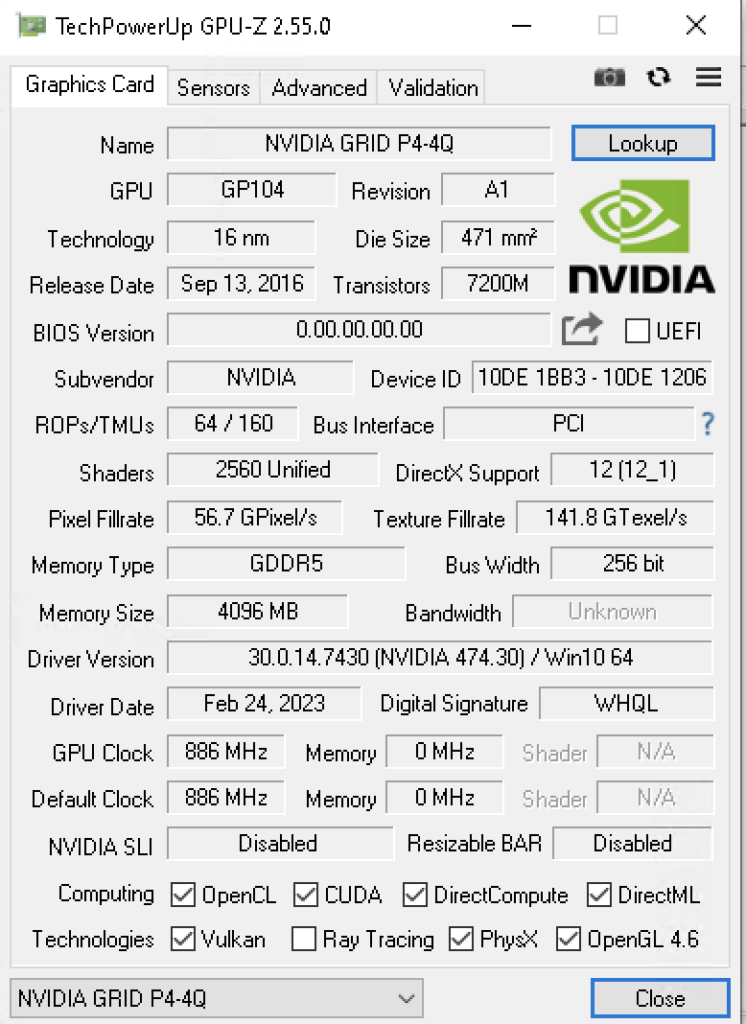
Using GPU-Z we can validate the resources being presented through to the Virtual Machine
Folding@Home
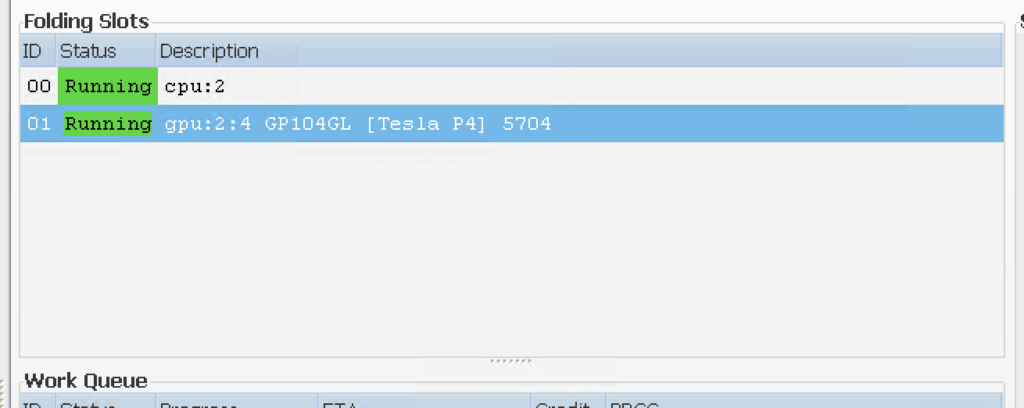
As a final step it was worth proving that the GPU can actually be used by the workload. For this I used the folding@home application as can be seen below.
My Folding@home stats can be seen here and consider joining your compute to the project as well
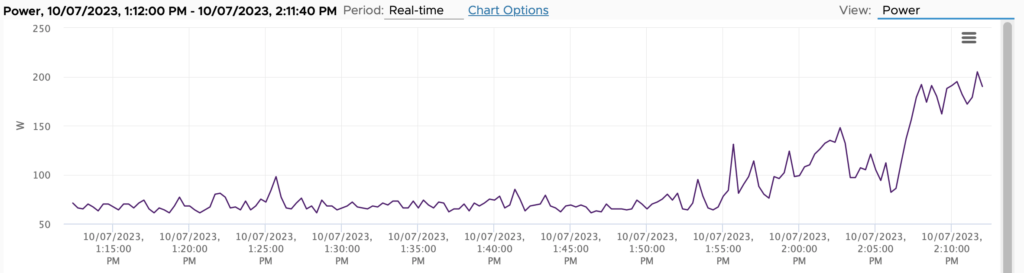
Just a side note that folding@home will use all of the CPU and GPU if you let it. Here is the power utilisation of the node and you can easily see where Folding@Home started.