Starlink
Since moving to Dorset last year internet connectivity has been the bane of my existence. Currently, I have an ADSL connection provided by my old employer Zen and a 5G connection provided by Three. These are both plumbed into my WatchGuard Firewall with multi-wan configured. Most of the time the usability is ok but there are multiple times a day when latency or packet loss is not acceptable. From living at previous locations where I had multiple companies that would deliver Gigabit Internet connections it was far from ideal. My job at VMware involves numerous calls with customers every day, typically presenting things to them and often with video on. Even a small interruption can leave a bad impression. VMware sells an SDWan product (Velocloud) and enables staff to use them. I was given one not long after I started, however, integrating it with my network has been suboptimal (as the device is locked down by VMware Corporate IT)
One of the nice features of the WatchGuard is that it monitors the WAN interfaces for me. At the time of writing this blog the Zen interface was dropping approx 10% of traffic (This is unusually bad) and although it isn’t easy to see the Three interface was also a non-zero packet loss. The Starlink one is showing as I had configured the interface but it was not connected at the time.

Given we have no plans to move I decided to bite the bullet and pay for Starlink. Prior to doing this I downloaded the Starlink App and used the Visibility function to scan the sky for obstructions. I climbed out onto part of our roof that is flat and scanned the sky. This uses the iPhone camera and the accelerometer’s to scan the sky for obstructions. Luckily the results were positive.
The intention is to drop the Zen connection when my contract runs out in a few months’ time. I can work around not having the /29 that comes with it with some Cloudflare magic that I will try and document in a follow-up post.
One thing to remember is that by default Starlink doesn’t ship you an ethernet adaptor. I ordered mine on the same day but it was shipped separately meaning I had to wait a few days before I could properly hook the system up. It’s a bit annoying to pay for an extra adaptor but £35 won’t break the bank. The other thing to pay attention to is the length of cable that you need. I went for the standard 75ft cable but it only just covers the length I need to get back to my firewall.
While waiting on the adaptor I decided to do some speed tests over Wifi from my iPhone 13 Pro
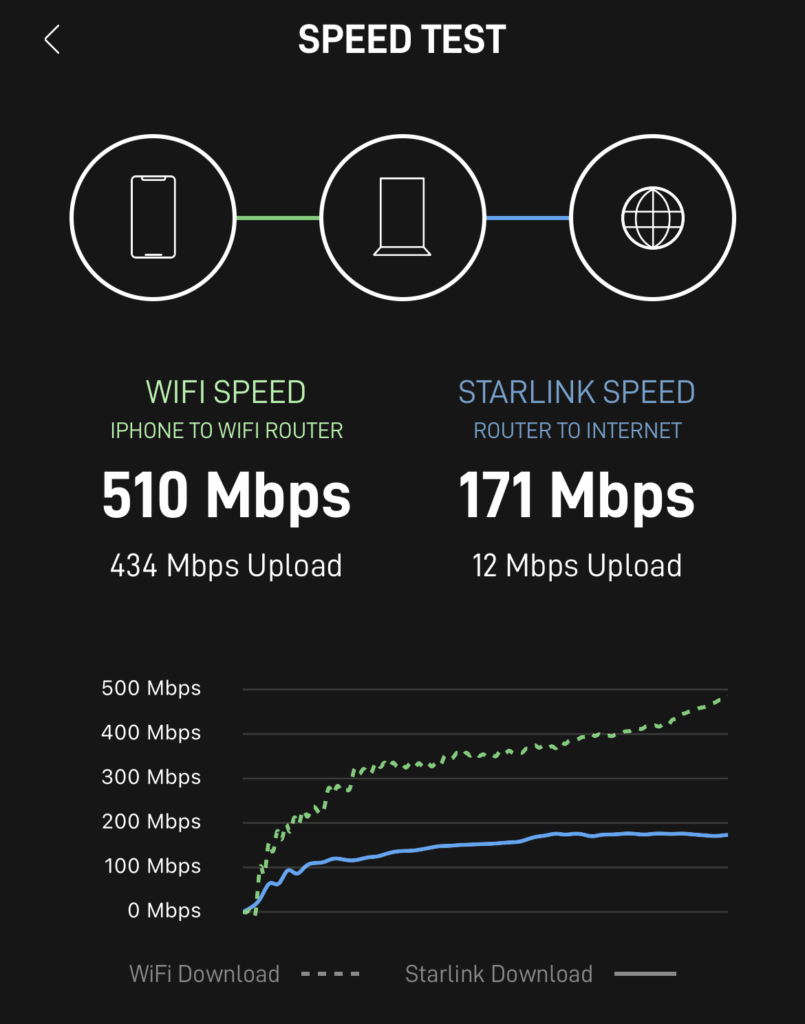
To prove it wasn’t Starlink massaging the numbers I also performed a number of speed tests to other third parties and got broadly similar results.
When the ethernet adaptor arrived I put the Starlink router in bypass mode. This can only be done from the iOS/Android App. The WatchGuard firewall interface was set to DHCP but once bypass was enabled it would not pick up a new address. I, therefore, rebooted the firewall and it came back with a CGNAT 100.65.x.x address removing the additional level of NAT. I will add a static entry on the firewall so I can still get to the Starlink management page. I believe the business service offers a fully routable IP.
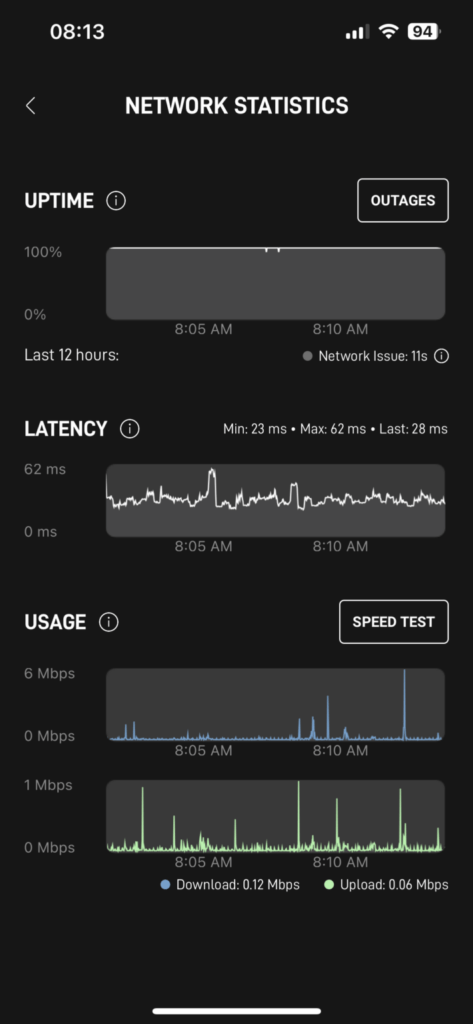
Once all the above had been done. It was a case of connecting Starlink to the relevant port on my firewall. I had already configured the port as an “External interface” and set the IP endpoint to monitor. The WatchGuard immediately picked up that the ethernet port came up and tried to hit its monitoring endpoint. As soon as this was successful traffic started to route over this link as intended.
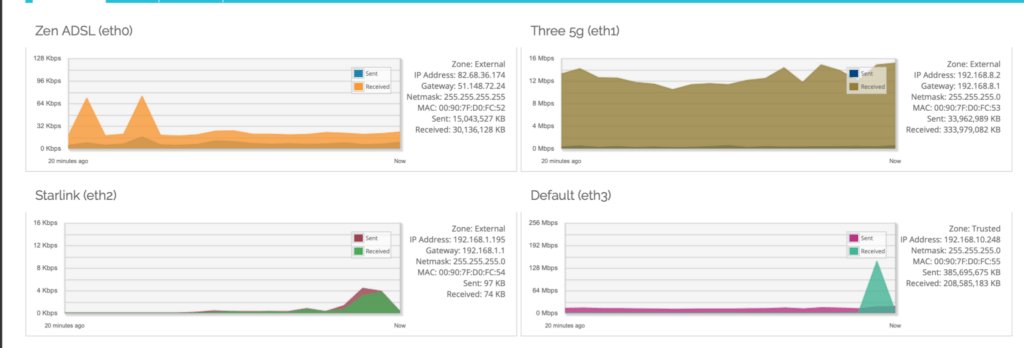
Due to the way I have configured traffic egress from the WatchGuard to the internet each TCP/IP session will stay on a link (unless there is a failure) and they will get moved to the next available link. New sessions will be distributed based on the weightings I have applied. With the WatchGuard I have this configured on a per-firewall policy basis. Most traffic I allow uses any available link however some traffic I steer e.g. SMTP is configured to only use the Zen link.


