Static WordPress hosting using Cloudflare
For a while now I have been running this site directly from Cloudflare utilising their excellent worker’s product. I did this originally as a learning exercise but due to the benefits It brought and the ease of use I decided to stick with it. The benefits are several fold:
- Crazy Web Performance (Typically full page load in less than 500ms see below)
- High Availability globally
- Zero attack surface
- ~Zero hosting costs
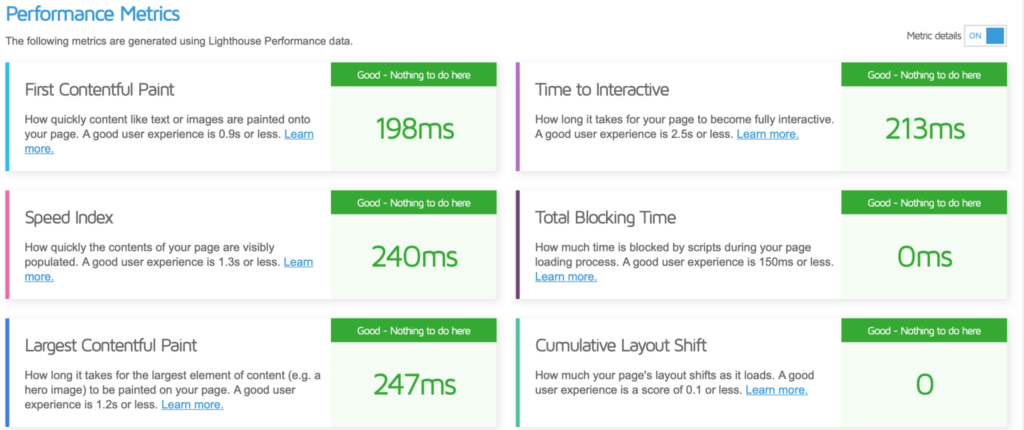
A couple of people have asked me about the setup so I thought I would try and document an overview.
Introduction
Firstly although this setup is effectively Serverless you need to have a copy of WordPress somewhere to make your edits. This doesn’t need to be exposed to the outside world (or can even be run just on your workstation/laptop using local. I have chosen to keep WordPress running in some docker containers on my Synology
The security of this setup is increased as WordPress is not published to the outside world. I do all of my editing locally, however, if I needed to change this I would leverage Cloudflare Access. Not publishing the site externally hugely reduces the attack surface as there is no implementation to attack. Editing and contributing content works in exactly the same way the difference is how content is published
At a very high level, I have a WordPress plugin that generates static content. This is then pushed into a GitHub Repo and from there, it’s pushed to Cloudflare Pages.
For
WordPress Setup
Within WordPress, I am utilising the simply static plugin to generate the static content.
Initially, I was using the free plugin but I have since decided to upgrade to the paid-for version.
In terms of the plugin setup, I have it set to use relative URL’s with a delivery method set to GitHub. This is done as the WordPress site is on my NAS and therefore has a URL of http://nas1.jameskilby.net/
I have then excluded the WordPress management URL’s in the static generation.
http://wordpress.jameskilby.cloud/wp-json
https://wordpress.jameskilby.cloud/wp-login.phpGitHub Setup
In the deployment section, I have added the relevant details so that the simply static plugin can push the relevant content into a GitHub repo
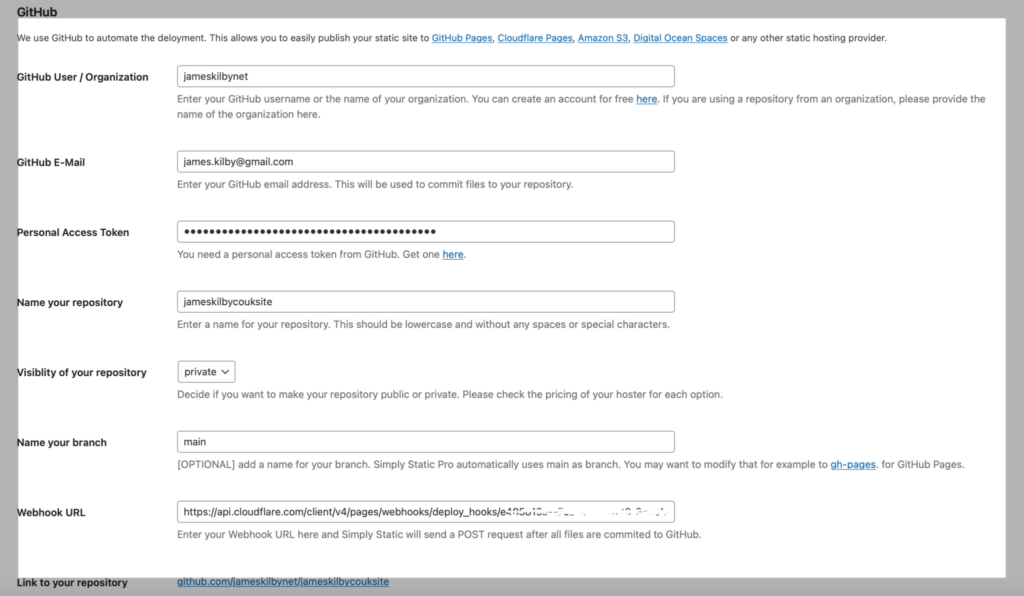
Within GitHub, I have created a repo (Called jameskilbycouksite) I have made this private but it could easily be a public repo. I have then added my personal access token so that SimplyStatic can push to the repo and lastly added a webhook to be called when the site has been updated (More on this a bit later)
Cloudflare Page Builds
The Cloudflare setup is probably the most complex part of the process but once it has been set up it’s fire and forget. The page’s site needs to be set up in Cloudflare and then a Webhook is created that the WordPress site can trigger. This is triggered when all of the site is committed to GitHub to tell Cloudflare to refresh the build.
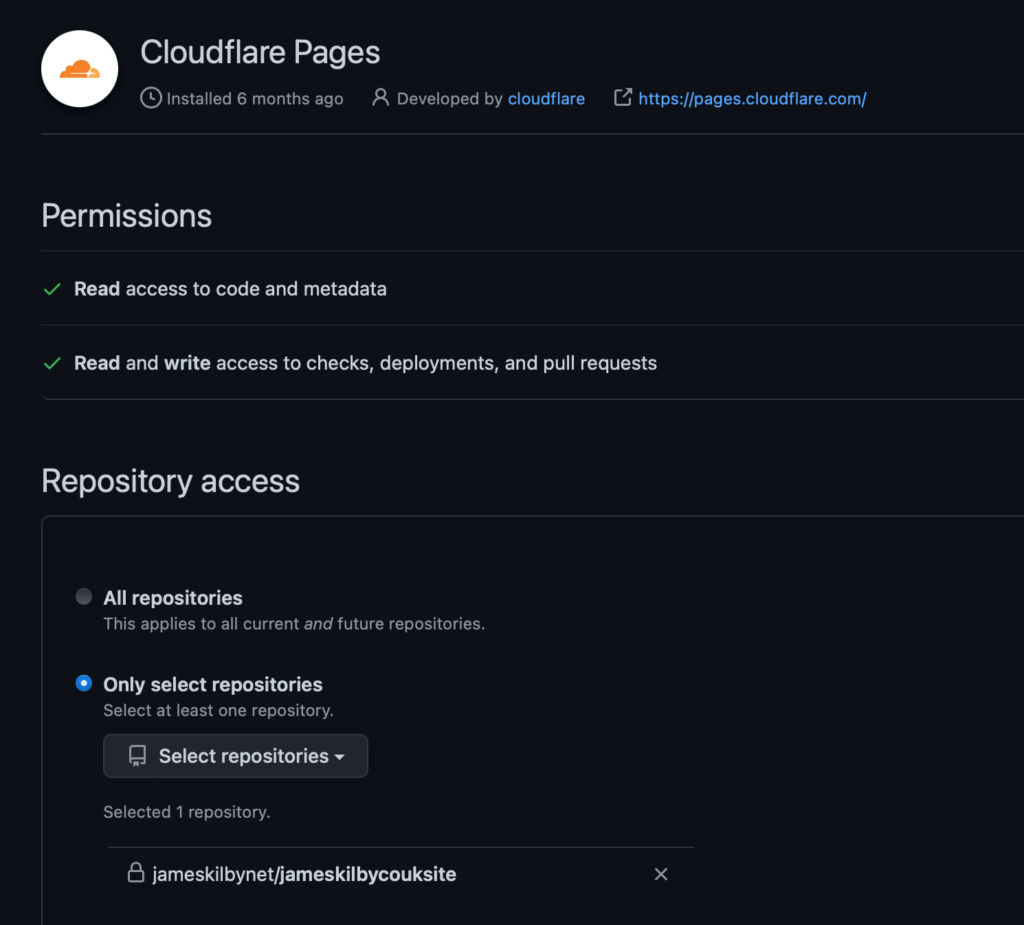
When you are logged into Cloudflare navigate to the pages section and create a project. At this point, I selected connect to Git and login/select the relevant GitHub account and Repo. For this to function, the GitHub Pages application needs to have been given permission in your GitHub Account
When a page is complete and published at a WordPress level a new button is enabled called “Generate Static” When this is clicked it will run the process to generate the static page, push it to GitHub and then to Cloudflare.
The Paid plugin allows for updating a single page, whereas the free plugin needs to generate the entire site again.
As seen below, a single page usually takes around 9 seconds to update with this setup. Generating the entire site and uploading took approx 30 mins.
[2022-07-17 18:37:46] Setting up
[2022-07-17 18:37:49] Fetched 1 of 1 pages/files
[2022-07-17 18:37:51] Committed / Updated 81 of 81 pages/files
[2022-07-17 18:37:55] Wrapping up
[2022-07-17 18:37:55] Done! Finished in 00:00:09Lastly, I have removed Google Analytics for privacy reasons and just utilise the web analytics built natively into Cloudflare.
Costs
The cost of running the site in Cloudflare for my blog is exactly zero which is amazing. This is one of the reasons I decided to buy the plugin as it was roughly equivalent to a year’s worth of decent hosting.
If your site is more popular then you may require one of the paid plans that starts at $5 a month.
The free tier gives you:
Workers Bundled (Workers Compute time)
- Up to 10ms CPU time per request
- Lowest latency after the first request
- Up to 100,000 requests per day (UTC+0)
KV (Key Value Storage)
- Global low-latency key-value edge storage
- Up to 100,000 read operations per day
- Up to 1,000 write, delete, list operations per day
Although I have paid $99 for the single-site plugin this is not essential. It does however eliminate some manual steps which I was keen to avoid. Plus although I am not currently using them it does support forms and search capabilities.
For more like this why not follow me on Twitter
