Homelab Storage Refresh (Part 1)
Table of Contents
Background
I have just completed the move of all my production and media-based storage/services to TrueNAS Scale. ( I will just refer to this as TrueNAS) This is based on my HP Z840 and I have now retired my faithful Synology DS918+ and DX517 expansion bay. (Those have gone to fellow vExperts Paul Wilk and Kev Johnson)
I loved the Synology ecosystem and I still believe it’s probably the easiest to get up and running and offers a very easy-to-use and performant system. Combine this with a large number of additional apps available together with docker it is very customisable. It makes an excellent entry into homelab storage at a relatively low cost. They are even more suitable for home use when you consider that they are typically quiet and very power efficient. I would have no hesitation in recommending a unit to someone.
However, my homelab needs could not be served by the units I had. I was especially constrained by the 2x Gigabit interfaces on the 918+ and the thought of spending multi-thousands for one compatible with my new 25Gb/s network and the number of drives I need really didn’t appeal. This was compounded by the fact that I already had most of the components I wanted to use. My replacement storage needed to be able to meet my current needs with significantly higher performance capabilities but also have room for future expansion.
Therefore the migration to TrueNAS was undertaken. I had the TrueNAS box running for a while (with a lower spec and only used it occasionally when I needed higher-performance storage)This was due to the significantly higher electrical usage.
However, it was time to complete the move of all data and media services. Up until this point, my media stack was running on my Synology DS918+. I have had a few issues recently with the Synology that I suspect are it running out of memory. I had upgraded it to 12GB but this was still not enough. As my Z840 TrueNAS server has way more RAM and CPU capabilities As part of the migration, I also consolidated some additional hardware into the TrueNAS host. This has now become the central piece of kit in my homely running a large number of services.
ZFS Overview
Before getting into details of the hardware and software config I think it’s worth giving an overview of ZFS in case anyone is unfamiliar. SUN Microsystems originally developed ZFS and it is a hugely capable storage platform. It is unusual in that it encompasses a volume manager and a file system. It is legendary for its data integrity capabilities and the scale of the system that could be deployed (it was originally called Zettabyte File System) It is a copy-on-write system (COW) If you are familiar with ZFS operation skip this section.
ZFS like a lot of modern storage technologies(VSAN etc) wants exclusive access to the underlying disks. This means using a HBA-based device rather than a RAID card. ZFS then groups these drives into a “Pool”
The default is to use drives for data storage “Data VDEV” This can also be done in several layouts and understanding how this is done is very important to performance. Conceptually these are similar to traditional RAID levels with RAID10 like mirror and stripe usually being recommended for high-performance systems and RAIDZ or RAIDZ2 are parity-based mechanisms with single and double drive protection similar to RAID5 and RAID6 this is recommended for large amounts of data that are not performance critical.
One of the additional advantages of ZFS is that drives of different types can be dedicated to additional roles to improve performance and resilience.
These additional roles are:
- Metadata
- Log
- Cache
- Spare
- Dedupe
I am using the Cache (L2ARC) and Log (ZIL) functionality and to understand these you have to know a little bit more about how ZFS functions under the covers.
Read Cache (ARC and L2ARC)
ARC and L2ARC are mechanisms to improve read performance only.
ARC or Adaptive Read Cache. Is a high-speed in-memory cache that stores recently accessed data. L2ARC stands for L2ARC Cache. It is a secondary cache that can be used to store data that is not currently in ARC. L2ARC can be implemented using storage devices, such as SSDs or NVMe drives.
ARC and L2ARC work together to improve the performance of ZFS. When an application requests data, ZFS first checks ARC to see if the data is present. If the data is in ARC, it is returned to the application without having to access the underlying storage devices. If the data is not in ARC, ZFS checks L2ARC. If the data is in L2ARC, it is copied to ARC and then returned to the application. If the data is not in L2ARC, it is read from the underlying storage devices and then added to ARC.
One advantage to how ZFS implements these cache mechanisms is that they do not need to be redundant as the data also exists in the storage pool. This means that if ARC was lost due to a crash/reboot or an L2ARC drive failed the data would be accessed from the underlying pool at a lower performance.
The use of ARC and L2ARC can significantly improve the performance of ZFS. In some cases, the use of L2ARC can even double the performance of ZFS. However, it is important to note that the use of ARC and L2ARC can also increase the amount of memory that is required to run ZFS.
In Truenas Scale only half of the available RAM is able to be used as ARC therefore I have 128GB of RAM available for ARC. The hit rate in my system is typically over 95%. One limitation I wish would be removed is that the ARC is a global cache improving all of your storage needs but the L2ARC is assigned to a pool of storage. Therefore if you have multiple pools you need to have (and configure) multiple L2ARC devices. (This can be done at the command line by adding different partitions onto one device but I am attempting to keep my system configured from GUI only)
L2ARC Configuration
For L2ARC I am using an Intel P3520 2TB NVMe in U2 form factor on a Startech PCI card. This is a perfect drive for L2ARC as is a heavy read-focused NVMe offering 375,000 IOPS and uptown 2700MB/s of read performance but only 26,000 IOPS and up to 1800MB/s of write performance. This isn’t an issue as by design the L2ARC fills slowly and with the later builds of Truenas, the data persists across reboots. This also helps with the relatively low data endurance of 1095 TBW
ZIL (ZFS Intent Log)
The ZIL or LOG device(s) is most likely the most misunderstood mechanism within ZFS. Its intention is to improve the performance of synchronous writes. So we need to know what a synchronous write is.
So let’s start with the definition: A synchronous write in ZFS is a write operation that is guaranteed to be committed to stable storage before the write operation returns. This means that the data will be written to the underlying storage devices and will not be lost in the event of a system crash or power failure.
In contrast, an asynchronous write doesn’t have to hit persistent storage before it’s committed this leads to higher performance at the risk of data loss.
When running VM’s sync write is basically essential.
The ZIL is used in the following way:
- When an application (Or VM) writes data to a ZFS file system, the data is first written to the ZIL.
- Once the data has been written to the ZIL, it is then written to the underlying storage devices.
- Once the data has been written to the underlying storage devices, the ZIL entry is marked as complete.
The ZIL is always present on a ZFS pool and if no dedicated device is used then this uses the existing pool devices. This increases the IO load on the pool devices and therefore for performance reasons, a dedicated high-performance device is highly recommended. Although technically a single device will achieve the higher performance if this device fails or is unavailable then the pool is also toast so at a minimum 2 should be considered.
ZIL Config
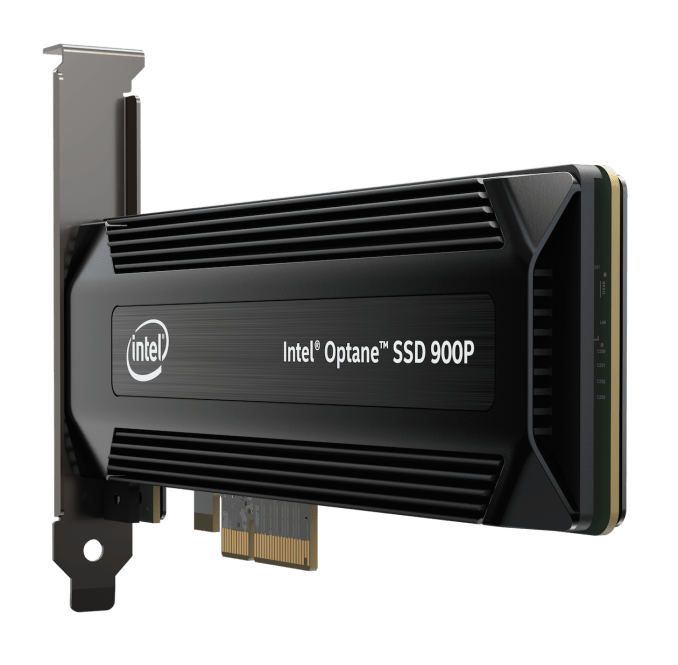
For the ZIL I am using two Intel Optane P4800X 750GB devices in a mirror configuration. I was VERY lucky to get these sample hardware devices from Intel as part of the VMware vExpert program and I have some blogs coming up dedicated to these devices.
These are capable of reading 550000 IOPS (4K Blocks) and unto 2500MB/s sequentially read and 550000 IOPS (4K Blocks) 2200 MB/s write Some crazy numbers…. The other thing that makes Optanes the best choice for this role is the endurance that they offer. The spec sheet says they will handle 41 Petabytes being written to them.
Hardware
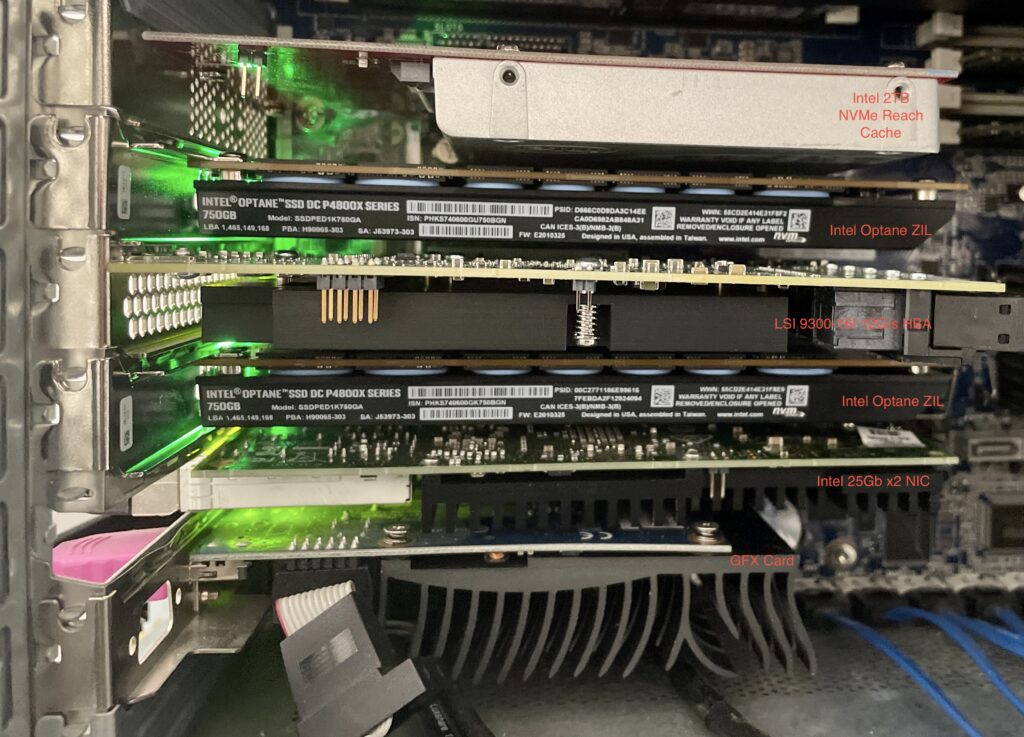
In terms of the setup of TrueNas server, it’s installed on an HP Z840. This has 2 x Intel Xeon E5-2673 V3 – 12-Core 2.40Ghz (48 Threads) and 256GB of ram. This is a high-end workstation device and sadly I don’t have the rack mount kit for it. However, it was chosen for its horsepower and ability to run all of the PCIe and storage devices that I needed. This includes having the cooling and electrical capabilities to run all the components. It has an 1125-watt power supply so we should be good. There are currently 19 different drives located within the chassis and it’s a little tight… See the PCI slots below.

I have mentioned the ARC Device and the Optanes (Slots 1,2 + 4) in the above picture. The last thing to mention is the HBA which is an LSI 9300 located in slot 3. All of my other data drives are connected to this.
The current disk architecture is shown below. However, this is likely not the final setup and it may change temporarily for testing.
| Role | Number | Device | Config | Usable/Role |
|---|---|---|---|---|
| Boot Drive | 2 | Intel 80GB SSD | MIRROR | N/A only used for TrueNas OS |
| SSD Pool | 6 | Samsung 860 EVO 2TB | 2 x MIRROR | 3 wide | 4.71TiB (TrueNas Apps and VM storage) |
| HD Pool 1 | 4 | Seagate IronWolf 8TB | 1xRAIDZ1 | 21TiB ( Media storage) |
| HD Pool 2 | 4 | HGST 1TB 7200RPM | 1xRAIDZ1 | 3TiB. ( Files and Photos) |
| ARC (Assigned to SSD Pool) | 1 | Intel 2TB NVMe | JBOD | N/A ARC is only used as a read cache and doesn’t contribute to capacity |
| SLOG (Assigned to SSD Pool) | 2 | Intel DC P4800X Optane | 2 x MIRROR | SLOG is a write log and doesn’t add to capacity |
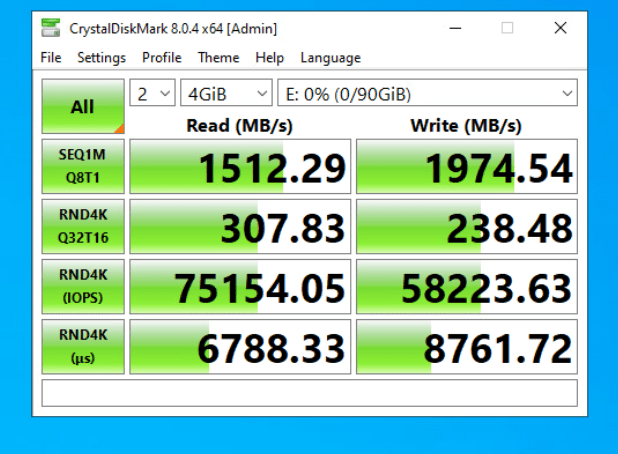
I will do some proper performance testing in my next post and Im sure there optimisations I can make before I do that but until that’s done. I did just run CrystalMark to ensure things are running in the right ballpark.

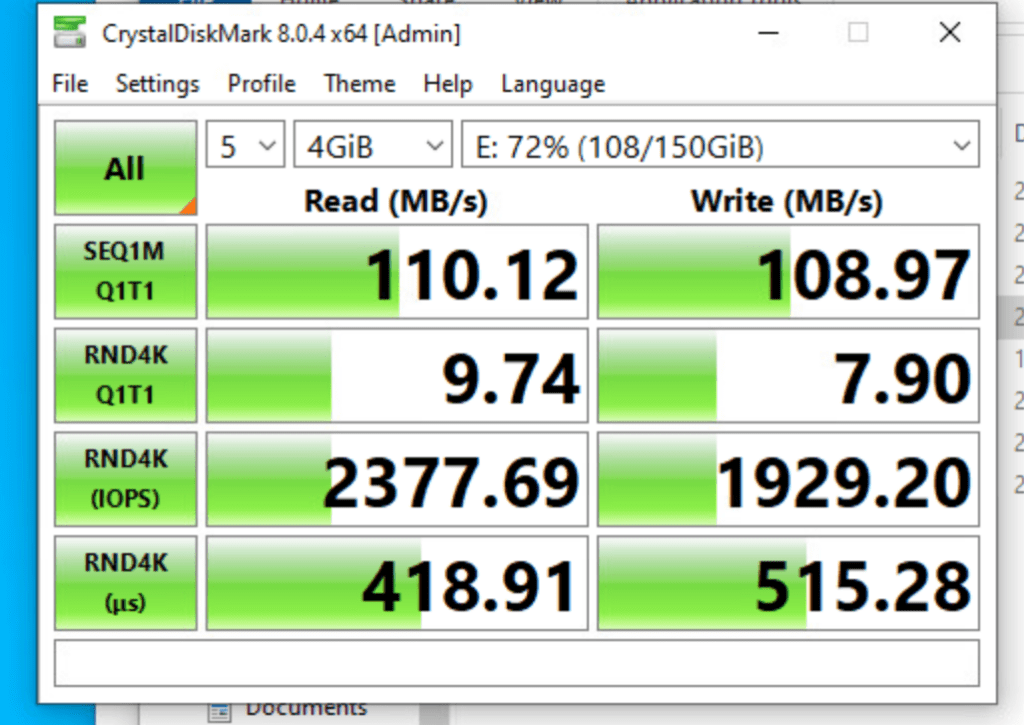
I dug out some old testing from the Synology. The test isn’t exactly the same but you can see the Read/Write and especially the IOPS are significantly higher.


